
How to Create a LetSuspense Component in React

Introduction
In this article, you will learn how to create a useful component using Composition in React to present placeholders on your page while data is being fetched in the background; When your content is available, it will simply swap the placeholder for the actual data.
What you need to know
- Some React experience
- Knowledge of React hooks (useEffect & useState)
Why do we need this?
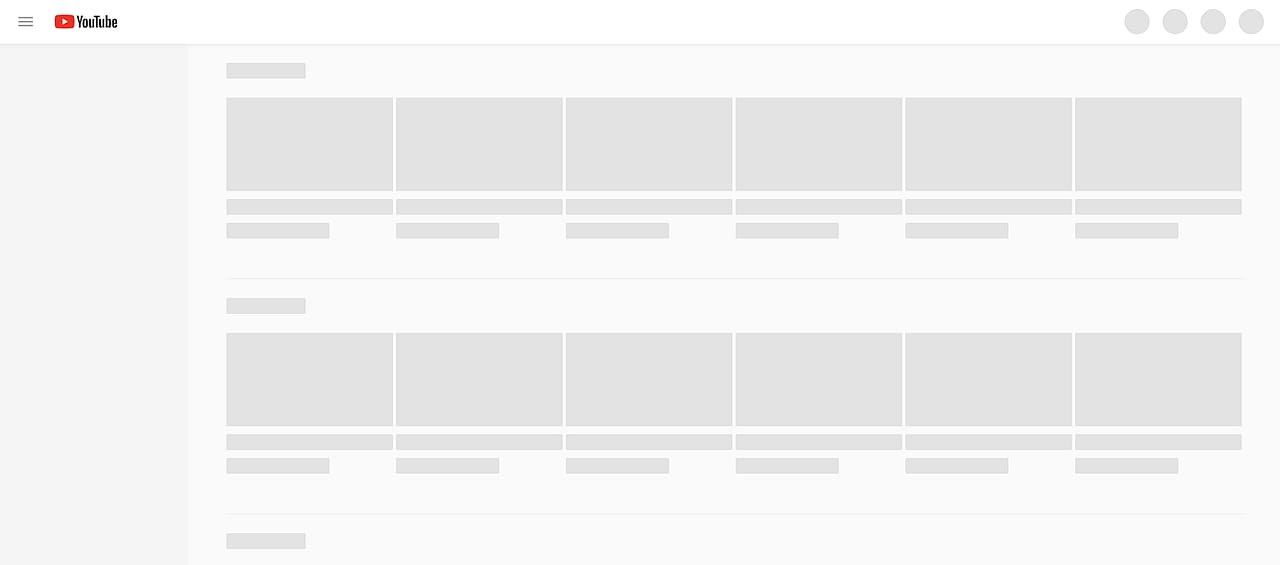
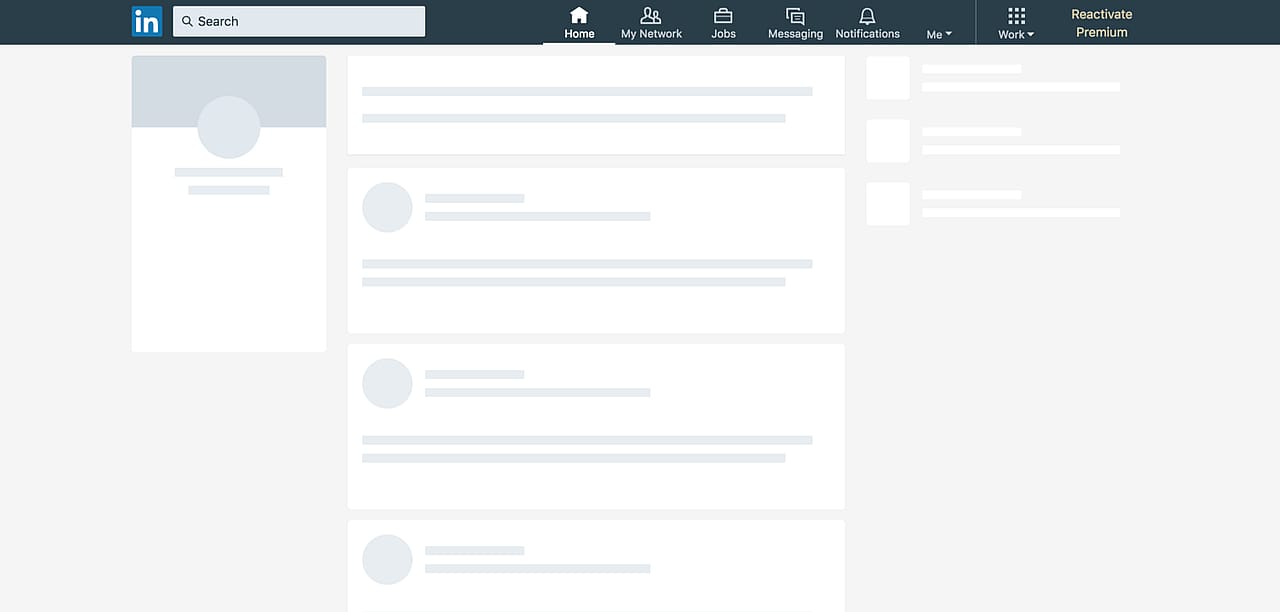
We're used to indeterminate spinners in web design because they're quick and easy to implement. A better approach to user experience would be to let the loader simulate the expected content; Most developers use skeleton loaders.
YouTube
In summary, this component will help us:
- Improve the user's visual experience.
- Write less code since our loader logic will be encapsulated and re-used in a declarative manner.
Setting up the Application
This tutorial focuses on creating a LetSuspense component so a simple demo has already been created. You can find a link to the source code here, in addition, you can also have a look at the live demo.
//App.js
function App() {
  const [movies, setMovies] = useState([]);
  const [query, setQuery] = useState('');

  const handleSearch = (query) => {
    setQuery(query);
  };

  useEffect(() => {
    fetchData();
  }, [query]);

  const fetchData = async () => {
    const result = await fakeApi(query);
    setMovies(result);
  };
  return (
    <div className="App">
      <div className="container">
        <h2 style={{ textAlign: 'center', color: '#fff' }}>Vuetube</h2>
        <SearchBar query={query} handleSearch={handleSearch} />
        <div className="card-container">
          {movies.map(({ id, title, img, desc }) => (
            <DataCard key={id} title={title} img={img} desc={desc} /> // render card
          ))}
        </div>
      </div>
    </div>
  );
}
Here is a snippet of the App.js file, at this stage it just fetches data from the fakeApi and renders the data, no loader is displayed.
Creating the LetSuspense Component
The LetSuspense is quite simple, it needs to accept a placeholder component, the actual component and a condition. It should render the placeholder as long as the condition is not met and the actual component when the condition is met.
I'll define a few more properties to enhance the LetSuspense.
Properties
Note:
The Code
First we need to import React and a few hooks and also destructure our expected props in the parameter; this helps with code completion.
//LetSuspense.js
import React, { Fragment, useEffect, useState } from 'react';

export default function LetSuspense({
  condition,
  placeholder: Placeholder,
  multiplier,
  initialDelay,
  checkOnce,
  children,
}) {
  return <Fragment></Fragment>;
}
Next we need to manage states; The condition (placeholder or actual component) and whether the condition has been checked.
//LetSuspense.js
...;
    const [component, setComponent] = useState([]);
    const [isChecked, setIsChecked] = useState(false);

    return (
        <Fragment>
        </Fragment>
    );
It's time to utilize useEffect, useEffect has a 2nd argument which takes an array and causes the component to re-render, we should add both the condition & children props to that array so whenever they change in the parent component, there will be updated here as well.
Note: Note:
childrenhere refers to a special props in React, props.children, which means that anything passed into our<LetSuspense>tag will be available and implicitly referenced aschildren.
//LetSuspense.js
useEffect(() => {
  // make sure the condition check happens just once if checkOnce is true
  if (checkOnce && isChecked) {
    setComponent([children]);
    return;
  }
  let delay = initialDelay || 0;
  let delayedTimeout = null;
  // render actual component when condition is true
  if (condition) {
    if (initialDelay) {
      delayedTimeout = setTimeout(() => {
        setComponent([children]);
      }, delay);
    } else {
      setComponent([children]);
    }
    setIsChecked(true);
  } else {
    // render placeholder as long as condition is false
    let tempComponent = [];
    multiplier = multiplier || 1;
    for (let i = 0; i < multiplier; i++) {
      tempComponent.push(<Placeholder key={i} />);
    }
    setComponent(tempComponent);
  }
  // cleanup side effects
  return () => {
    if (delayedTimeout) {
      clearTimeout(delayedTimeout);
    }
  };
}, [condition, children]);
return <Fragment></Fragment>;
The useEffect will populate the component array with the placeholders or actual component that need to be rendered. We can map that array to return a new component.
//LetSuspense.js
...;
  return (
    <Fragment>
      {component.map((component, index) => (
        <Fragment key={index}>{component} </Fragment>
      ))}
    </Fragment>
  );
Great! that's all you need to create your LetSuspense Component, let's import that to our App.js file and see how we can wrap it around our Datacard.
//App.js
const fetchData = async () => {
  const result = await fakeApi(query);
  setMovies(result);
};

return (
  <div className="App">
    <div className="container">
      <h2 style={{ textAlign: 'center', color: '#fff' }}>Vuetube</h2>
      <SearchBar query={query} handleSearch={handleSearch} />
      <div className="card-container">
        {/* LetSuspense Added, it encapsulates its children/actual component*/}
        <LetSuspense
          condition={movies.length > 0}
          placeholder={Placeholder}
          multiplier={3}
          initialDelay={200}
        >
          {movies.map(({ id, title, img, desc }) => (
            <DataCard key={id} title={title} img={img} desc={desc} /> //render card
          ))}
        </LetSuspense>
      </div>
    </div>
  </div>
);
Final Notes
Hopefully, this tutorial showed you how to create a useful component that will come in handy for most of your projects.
Try adding some new props to enhance your LetSuspense like a timeout and an alternative placeholder for when it times out (could just be a text with a message or a button to retry fetching data).
Note: This article was written by Everistus Akpabio, you can visit his website and Github profile.