Scroll-Aware Navigation Bar
Intersection Observer API can be used for implementing different features in websites such as:
- Lazy loading images
- Infinite scrolling
- Animations on scroll
and many other things that rely on scrolling of the browser window.
In this tutorial, we will create a navigation bar that highlights items in its navigation menu when a corresponding section of the webpage scrolls into view. In other words, we will create a scroll-aware navigation bar that knows which section of the webpage is currently in view.
What We Will Build
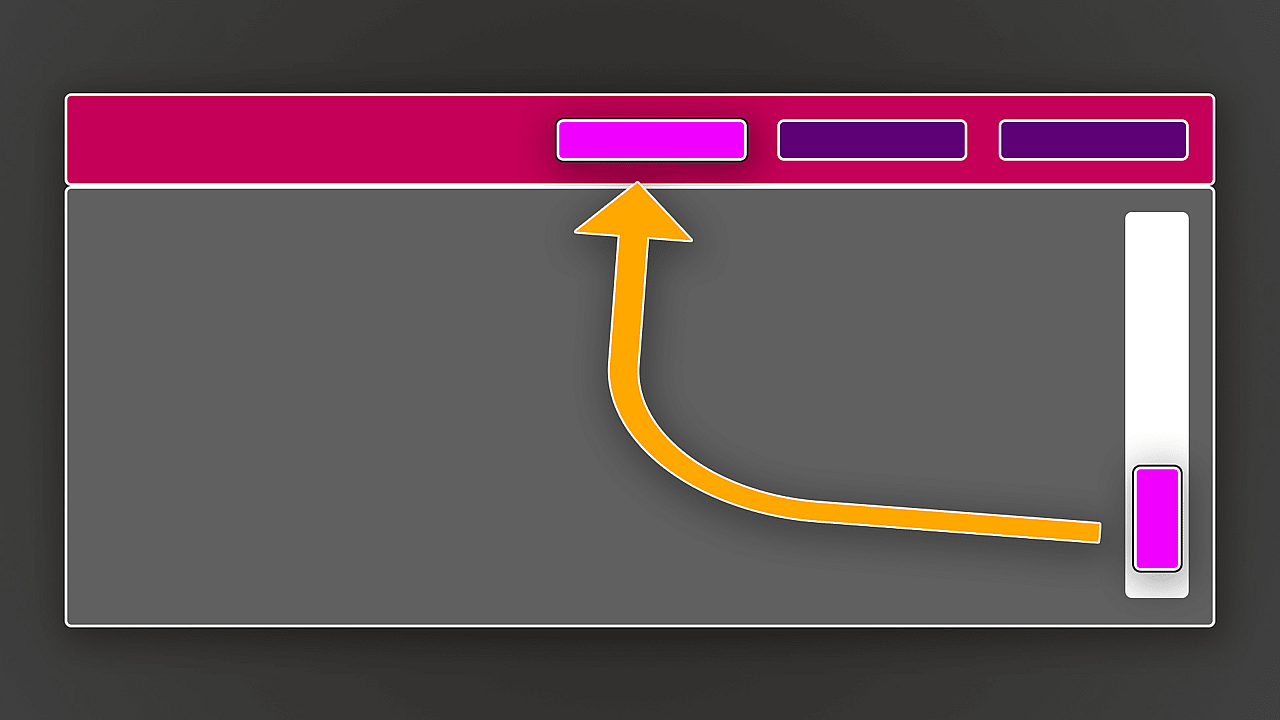
Here's what we'll build:
In the image, you can see, that as we scroll, the navigation item corresponding to the section that is in view gets underlined.
We will use the IntersectionObserver API for this purpose. We could also use a scroll event listener but that would be inefficient as compared to using IntersectionObserver API.
First of all, we need to write some HTML code to create a webpage that contains a navigation bar and some sections that correspond to the navigation menu items in the navigation bar.
<header>
  <nav>
    <a href="#home" class="navItem">Logo</a>
    <div class="navMenu">
      <a href="#home" class="homeNavItem navItem">Home</a>
      <a href="#about" class="aboutNavItem navItem">About</a>
      <a href="#services" class="servicesNavItem navItem">Services</a>
      <a href="#downloads" class="downloadsNavItem navItem">Downloads</a>
      <a href="#contact" class="contactNavItem navItem">Contact</a>
    </div>
  </nav>
</header>
<main>
  <section class="home" id="home">
    <h1>
      Home
    </h1>
  </section>
  <section class="about" id="about">
    <h1>
      About
    </h1>
  </section>
  <section class="services" id="services">
    <h1>
      Services
    </h1>
  </section>
  <section class="downloads" id="downloads">
    <h1>
      Downloads
    </h1>
  </section>
  <section class="contact" id="contact">
    <h1>
      Contact
    </h1>
  </section>
</main>
And here's the CSS code:
body {
margin: 0;
}
nav {
background-color: #30323d;
padding: 15px 20px 15px 25px;
display: flex;
justify-content: space-between;
align-items: center;
color: #fff;
font-size: 1.1rem;
position: fixed;
top: 0;
right: 0;
left: 0;
}
.navMenu {
flex-basis: 70%;
max-width: 550px;
display: flex;
justify-content: space-between;
}
.navMenu span {
padding: 10px;
margin: 0 0 0 10px;
cursor: pointer;
}
.navMenu span:hover {
background-color: #484b5b;
}
.active {
border-bottom: 2px solid #fff;
}
section {
height: 100vh;
display: flex;
align-items: center;
justify-content: center;
font-size: 3.5rem;
}
.home {
background-color: #9c1de7;
}
.about {
background-color: #28c7fa;
}
.services {
background-color: #f85959;
}
.downloads {
background-color: #107a8b;
}
.contact {
background-color: #fd0054;
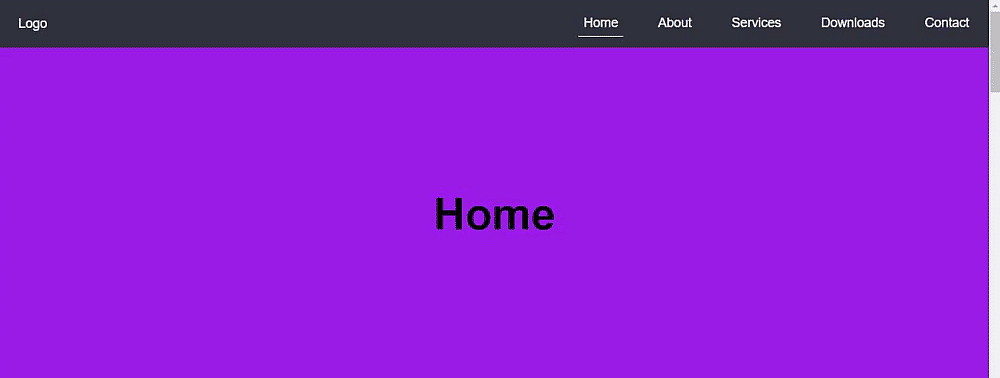
}At this point, we should have a basic webpage:
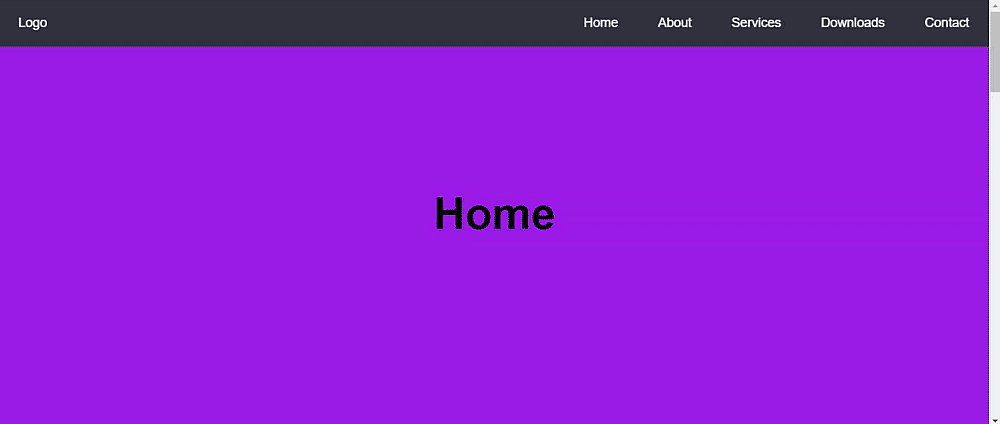
But currently, there's no indication of which section of the web page is in view.
Before we write any JavaScript code, we need to link a JavaScript file to our HTML file.
<script src="script.js"></script>Now we are all set to write some JavaScript code to achieve a scroll-aware navigation bar.
First we will write a simple helper function that will help us select elements in the DOM.
function selectElementByClass(className) {
  return document.querySelector(`.${className}`);
}
This function returns the DOM element with a class that is passed to this function as an argument.
Now let's select different sections in our web page, using the above written helper function.
const sections = [
  selectElementByClass('home'),
  selectElementByClass('about'),
  selectElementByClass('services'),
  selectElementByClass('downloads'),
  selectElementByClass('contact'),
];

const navItems = {
  home: selectElementByClass('homeNavItem'),
  about: selectElementByClass('aboutNavItem'),
  services: selectElementByClass('servicesNavItem'),
  downloads: selectElementByClass('downloadsNavItem'),
  contact: selectElementByClass('contactNavItem'),
};
We have defined an array named sections that contains all the sections in our web page and for which we have a corresponding navigation item in the navigation bar.
After that we have a navItems object that maps each section's id to the corresponding item in the navigation bar.
Now we will create an instance of IntersectionObserver. We need to pass two arguments to the constructor of the IntersectionObserver which are:
- A callback function
- An options object to configure the observer instance
// intersection observer setup
const observerOptions = {
  root: null,
  rootMargin: '0px',
  threshold: 0.7,
};

function observerCallback(entries, observer) {
  entries.forEach((entry) => {
    if (entry.isIntersecting) {
      // get the nav item corresponding to the id of the section
      // that is currently in view
      const navItem = navItems[entry.target.id];
      // add 'active' class on the navItem
      navItem.classList.add('active');
      // remove 'active' class from any navItem that is not
      // same as 'navItem' defined above
      Object.values(navItems).forEach((item) => {
        if (item != navItem) {
          item.classList.remove('active');
        }
      });
    }
  });
}

const observer = new IntersectionObserver(observerCallback, observerOptions);

sections.forEach((sec) => observer.observe(sec));
Now, we have an IntersectionObserver setup that includes options for the observer and a callback function which will be called by the IntersectionObserver.
Finally, an instance of IntersectionObserver is created, passing in the callback and options object to the constructor and then iterating over the sections array to make our observer observe each section in our web page.
IntersectionObserver Options
IntersectionObserver takes an options object which contains three properties which are explained below:
root- this option specifies the element that is used as the viewport for checking whether the observed element is in the view or not. If it isnullor is not specified, then it defaults to browser's viewport. In our code, we have set this option tonull.rootMargin- specifies themarginaround therootelement and takes values similar to CSSmargin. Defaults to zero. This option can be used to grow or shrink the bounding box of therootelement in which target elements are viewed. In our code, we have set this option to default value which is0px.threshold- specifies at what percentage of target element's visibility the observer's callback should be called. Its value could be a single number or an array of numbers which indicate the percentage values of target element's visibility at which observer's callback should be called. In our code, we have set this option to0.7which means the callback function of theIntersectionObserverwill be called whenever 70% of any target element is in view.
IntersectionObserver Callback Function
The callback function, that is passed as a first argument to IntersectionObserver constructor, is called whenever the target element, that is being observed by our observer, comes into view and also when it goes out of the view. Callback is also called initially when an instance of IntersectionObserver is created.
This callback function takes two parameters:
entries- an array of target elements that are being observed by the observerobserver- the instance of the observer
In our code, inside the callback function, we are iterating over the entries array and checking if the current entry is in view or not. This is done using the isIntersecting property of each entry object.
If the current entry is in view, then we do following steps:
- Get the navigation item corresponding to the
idof the section that is in view - Add an
activeclass on the navigation item that was fetched in step 1 - Iterate over the navigation items and remove the
activeclass on any navigation item that is not equal to the navigation item fetched in step 1
Final Result
Following is the final result.
You can customize how you want any navigation item to be highlighted by changing the styles in .active class in CSS.

Final Thoughts
There's so much more that you can do with the IntersectionObserver API - in an efficient way as compared to using a scroll event listener.
One thing to keep in mind is that code inside the callback function of IntersectionObserver runs on the main thread, so make sure you don't write any code inside the callback function that could take some time to run.